Setting up a CI/CD on CPanel for a NuxtJS project.

Setting up a CI/CD on CPanel for a NuxtJS project.
Recently working on one of our released products which are deployed on a shared hosting server, I noticed how it is really tiring and annoying it could be generating and manually deploying to CPanel for each small fixes and change I make. The project I was working on is a NuxtJs project so typically after I finish changing or fixing something I had to build the project, upload it to the server using CPanel’s file manager and replace the old files. This soon became really annoying and I started my search for a way to implement a CI/CD pipeline on my server.
After a few google searches, I noticed the lack of information on how to set up a CI/CD pipeline on CPanel not just for NuxtJS but also for other frameworks. After a while, I found a tutorial video that explained how to set it up. a CI/CD for Nuxt on CPanel. But this video required you to remove the dist folder from .gitignore and push it to GitHub, which for some reason did not sit right with me. But I found one good tool from this video which was buddy.works.
Buddy is a CI/CD tool with more than 100 actions that will help you set up your CI/CD pipeline. It is really easy to get started with and contains a generous free plan that allows you to create 5 projects and run 120 pipeline runs every month. After creating an account on Buddy, I created my first project and connected it to my Github project. After this, I created a pipeline for my project.
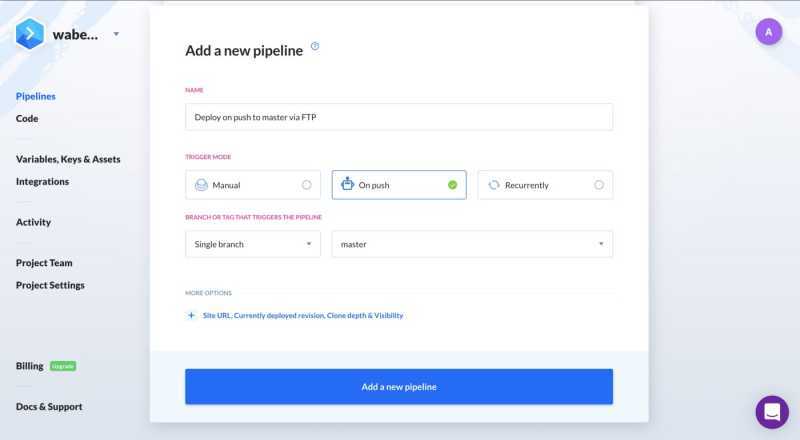
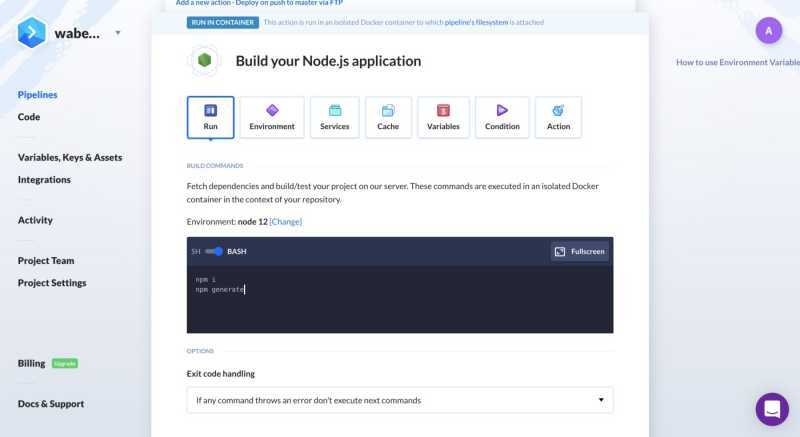
I named my pipeline, set it to be triggered on every push, and set it to deploy from the master branch of my repo. After this, I started adding actions to this pipeline. The first action I added was a NodeJs action which loads a docker image with preinstalled NodeJs that will be used to run node tasks. Then I added to command for installing and generating my static files.
After generating the static files, I needed another action to move these files to my CPanel hosting location. Luckily buddy has also an FTP action that can be used to move the generated files to the CPanel hosting. I added this action after the NodeJS action and gave it the dist folder as the source folder and public_html as the destination folder.

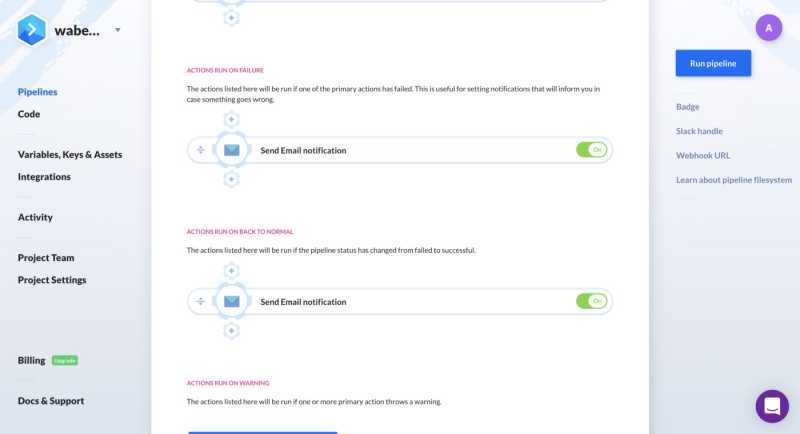
I also had to create an FTP account from CPanel to connect with Buddy. To do this you can search for FTP from CPanel and create a new credential and enter them in the fields in the above picture. After this, I also added two actions that send emails to me when something goes wrong and the pipeline stops and when the pipeline starts working again.